Face and Eye Detection with Python - Static Image
Detecting the face and eyes of a static image in the frontal plane is a straightforward Computer Vision task. We are able to use the pre-trained cascade models which come with OpenCV; these are based on trained Haar features. I wanted to provide a copy of the syntax I use. Whenever I approach a problem, I always use a basic syntax first, as a baseline comparison.
In this post, I will detail how to identify any face and/or eyes using Python and OpenCV using static images. I will make a follow-up blog post for how to identify face and eyes using a web camera in real-time. It is very important that you have both setup on your system, otherwise you will not be able to compile the code. Also, take note of any comments within the code.
Static Image
Providing a whole image may result in a large number of false-positives of eyes. Therefore, we firstly detect the face, then detect any eyes which be presented.
import cv2

#Setup the enviorment by linking to the Haar Cascades Models

face_cascade = cv2.CascadeClassifier('haarcascades/haarcascade_frontalface_default.xml')
eye_cascade = cv2.CascadeClassifier('haarcascades/haarcascade_eye.xml')
The first step is to call in the OpenCV library using import cv2. Then, we link the Cascade Classifier of the face and eyes using the OpenCV pre-trained models face_cascade =cv2.CascadeClassifier('path to models'). With the classifiers initialised we now need to read in the static image and display it using the Python GUI.
img = cv2.imread('dan.jpg')

# Resize the image to save space and be more manageable.
# We do this by calculating the ratio of the new image to the old image
r = 500.0 / img.shape[1]
dim = (500, int(img.shape[0] * r))

#Perform the resizing and store the resized image in variable resized
resized = cv2.resize(img, dim, interpolation = cv2.INTER_AREA)

#Display the image
cv2.imshow('image',resized)
cv2.waitKey(0) #Before moving on, wait for a keyboard click.
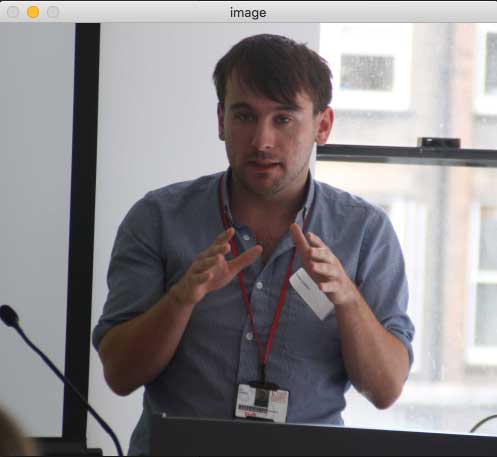
We import the selected image using the OpenCV function cv2.imread. This is passed into the variable img. Because the images I use are high definition I resize the image using cv2.resize function for visibility. Generally, this should be avoided. I wanted to provide the syntax for how to scale an image. Finally, we can display the image in a GUI using cv2.imshow where 'image' is the title of the GUI and resized is the scaled image. You will notice cv2.waitKey(0) which keeps the image open until the user presses any key. You will get a display such as:
#Process the image - convert to BRG to grey
grey = cv2.cvtColor(resized, cv2.COLOR_BGR2GRAY)

cv2.imshow('image',grey)
cv2.waitKey(0) #Before moving on, wait for a keyboard click.
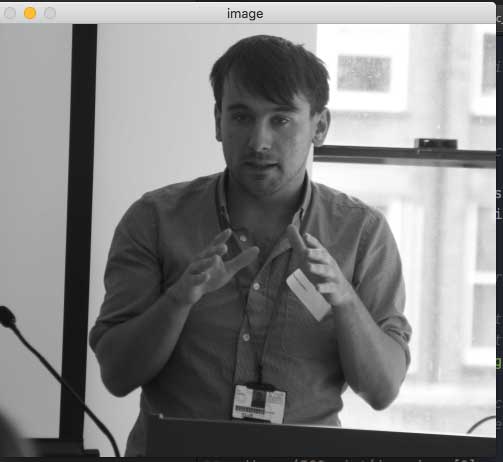
We then convert the image from RGB to grey (black and white) using cs2.cvtColor(orgImage, cs2.COLOR_BGR2GRAY) as the input for the Cascade Classifier. Note: this is required to enable the classifier to function correctly. Change orgImage to reflect the image that needs to be grey scaled. You will end up with something such as:
#Identify the face and eye using the haar-based classifiers.
faces = face_cascade.detectMultiScale(grey, 1.3, 5)

for (x,y,w,h) in faces:
    cv2.rectangle(resized,(x,y),(x+w,y+h),(255,0,0),2)
    roi_grey = grey[y:y+h, x:x+w]
    roi_color = resized[y:y+h, x:x+w]
    eyes = eye_cascade.detectMultiScale(roi_grey)
for (ex,ey,ew,eh) in eyes:
    cv2.rectangle(roi_color,(ex,ey),(ex+ew,ey+eh),(0,255,0),2)

#Display the bounding box for the face and eyes
cv2.imshow('img',resized)
cv2.waitKey(0)
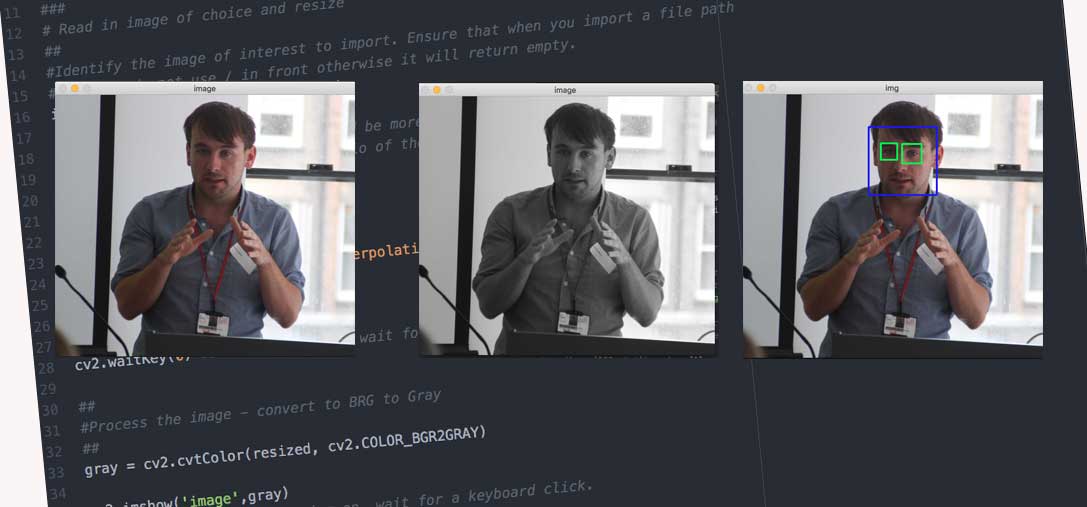
The final stage is to pass the grey scaled image into face_cascade.detectMultiScale(grey, 1.3,5) to identify any faces which may be present in the image. Any faces which are detected are returned into a faces matrix. The for loop draws the bounding boxes and identifiers the eyes for any detected faces regions. Resulting in something such as:
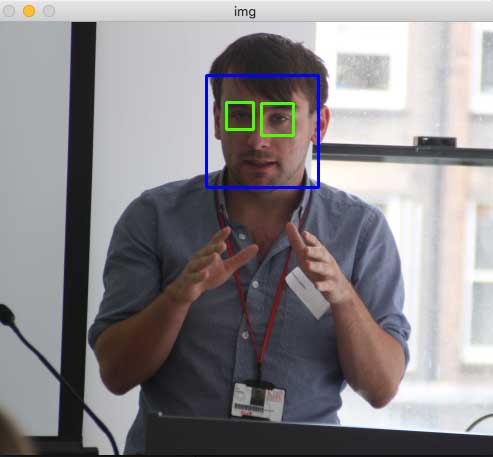
Note that if no faces are detected an error is thrown.
If you pull it all together you should end up with:
import cv2

#Setup the enviorment by linking to the Haar Cascades Models

face_cascade = cv2.CascadeClassifier('haarcascades/haarcascade_frontalface_default.xml')
eye_cascade = cv2.CascadeClassifier('haarcascades/haarcascade_eye.xml')

#Identify the image of interest to import. Ensure that when you import a file path
#that you do not use / in front otherwise it will return empty.
img = cv2.imread('data/dan3.jpg')

# Resize the image to save space and be more manageable.
# We do this by calculating the ratio of the new image to the old image
r = 500.0 / img.shape[1]
dim = (500, int(img.shape[0] * r))

# Perform the resizing and show
resized = cv2.resize(img, dim, interpolation = cv2.INTER_AREA)

#Display the image
cv2.imshow('image',resized)
cv2.waitKey(0) #Before moving on, wait for a keyboard click.


#Process the image - convert to BRG to grey
grey = cv2.cvtColor(resized, cv2.COLOR_BGR2GRAY)

cv2.imshow('image',grey)
cv2.waitKey(0) #Before moving on, wait for a keyboard click.

#Identify the face and eye using the haar-based classifiers.
faces = face_cascade.detectMultiScale(grey, 1.3, 5)

for (x,y,w,h) in faces:
    cv2.rectangle(resized,(x,y),(x+w,y+h),(255,0,0),2)
    roi_grey = grey[y:y+h, x:x+w]
    roi_color = resized[y:y+h, x:x+w]
    eyes = eye_cascade.detectMultiScale(roi_grey)
for (ex,ey,ew,eh) in eyes:
    cv2.rectangle(roi_color,(ex,ey),(ex+ew,ey+eh),(0,255,0),2)

#Display the bounding box for the face and eyes
cv2.imshow('img',resized)
cv2.waitKey(0)
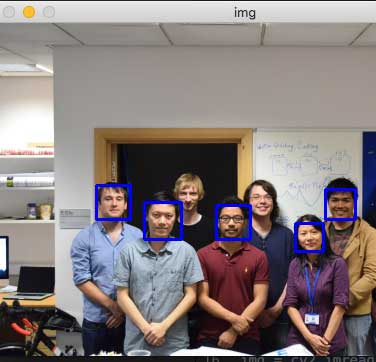
You can even add multiple faces into the same image, such as the one below. You may need to fine-tune the parameters to detect the eyes.